API Integration
| Time to Complete | 2-4 days |
|---|---|
| Time to Test and Deploy | 1-2 weeks |
| Skills Required | Make API calls, send SMS, build UX |
Complete the 1-Click Signup Setup guide before following this API Integration guide.
Please do all development work and testing against our Sandbox environment, which returns mock data. You can use our Production environment when you're ready to go live.
sequenceDiagram
    actor U as User
    participant C as Customer
    participant V as Verified

    Note left of U: 1. Prompt user for inputs.
    C ->>+ U: Collect verified phone, challenge, and consent
    U ->>- C: Provide verified phone, challenge, and consent
    Note left of U: 2. Call POST /1-click.
    C ->>+ V: Call POST /1-click
    alt Additional info required
        V -->>- C: OCE011 error code
        C ->>+ U: Show DOB/SSN4 field(s)
        U ->>- C: Enter DOB/SSN4
        C ->>+ V: Call POST /1-click with DOB/SSN4
        alt Additional info mismatched
            V -->>- C: OCE012 error code
            C ->>+ U: Show DOB/SSN4 field(s)
            U ->>- C: Enter DOB/SSN4
            C ->>+ V: Call POST /1-click with DOB/SSN4
            break No credentials found
                V -->>- C: OCE013 error code
                C ->>+ U: Take user to manual signup
            end
        end
    end
    V ->> V: Source data (credentials and metadata)
    V -->> C: Return data
    Note left of U: 3. Have user confirm data.
    C ->>+ U: Display credentials
    U ->>- C: Confirm credentials
1. Prompt user for inputs.
To start 1-Click Signup for a user, you'll need to collect their:
- verified phone number,
- challenge (first name, birth date, or SSN4), and
- consent.
1-Click Signup can work without a challenge (with just a verified phone number) for about 20% of users, but the output data quality is lower. We recommend collecting a challenge so the data we autofill is high quality, especially if your use case involves sensitive data like SSNs.
See the Verified Phone, Challenge, and Consent sections below for important details about each of these.
You can collect these inputs in combination and in any order, but you need to collect all three before calling POST /1-click (step 2). Here are some examples:
Example Flows
- Phone + Consent
- Challenge + Consent
- Challenge + Phone + Consent
- Consent Separate
Phone + Consent First
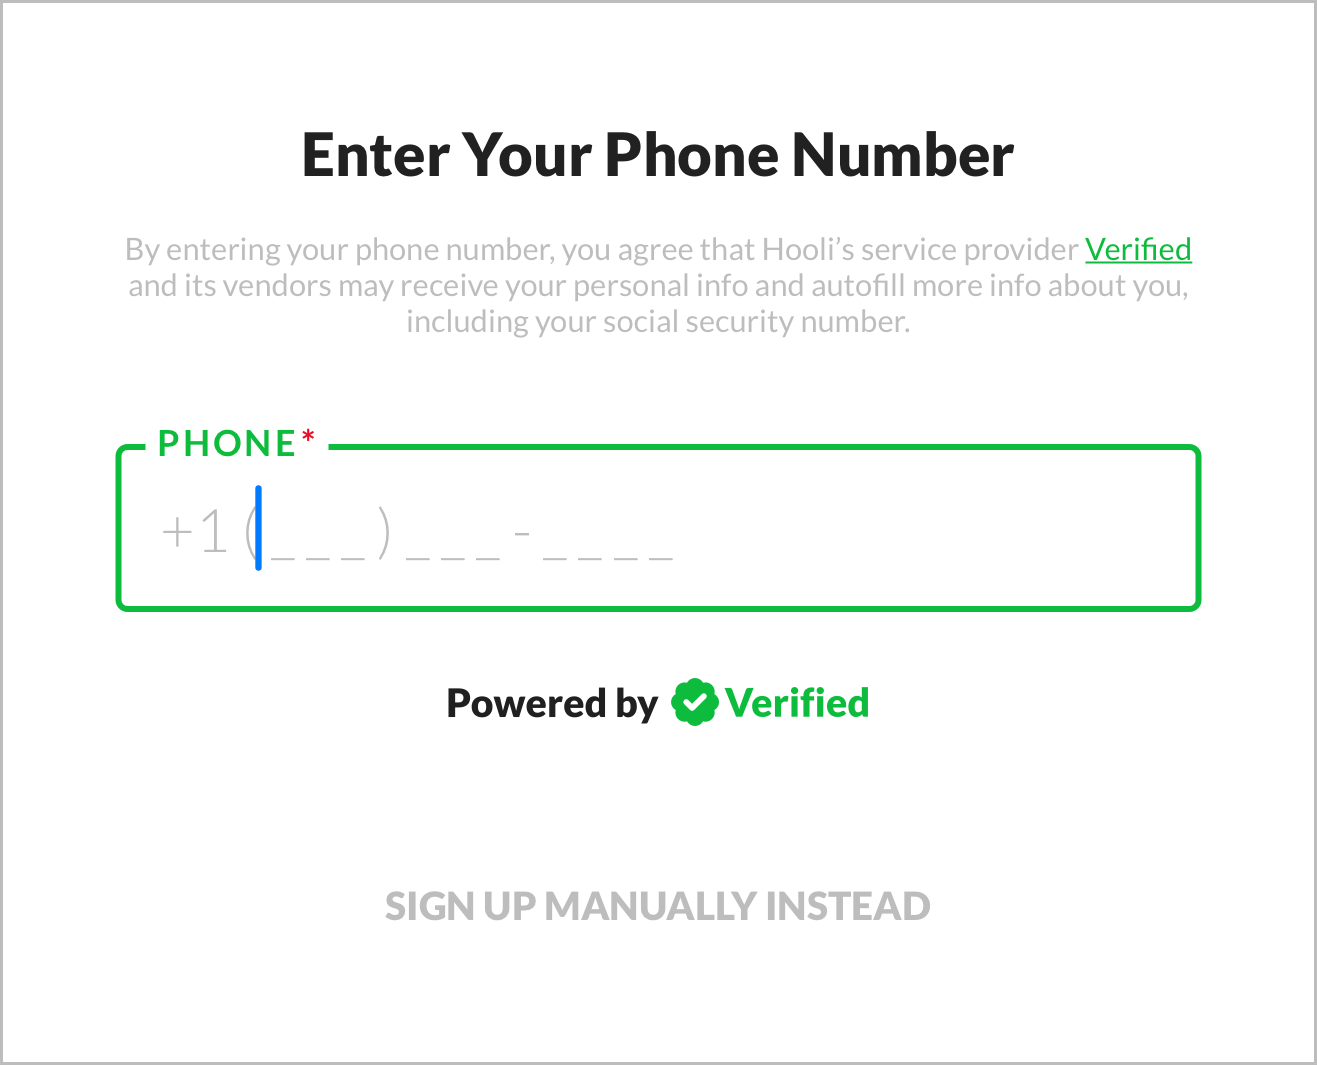 1. Phone + Consent: Prompt user for phone and consent.
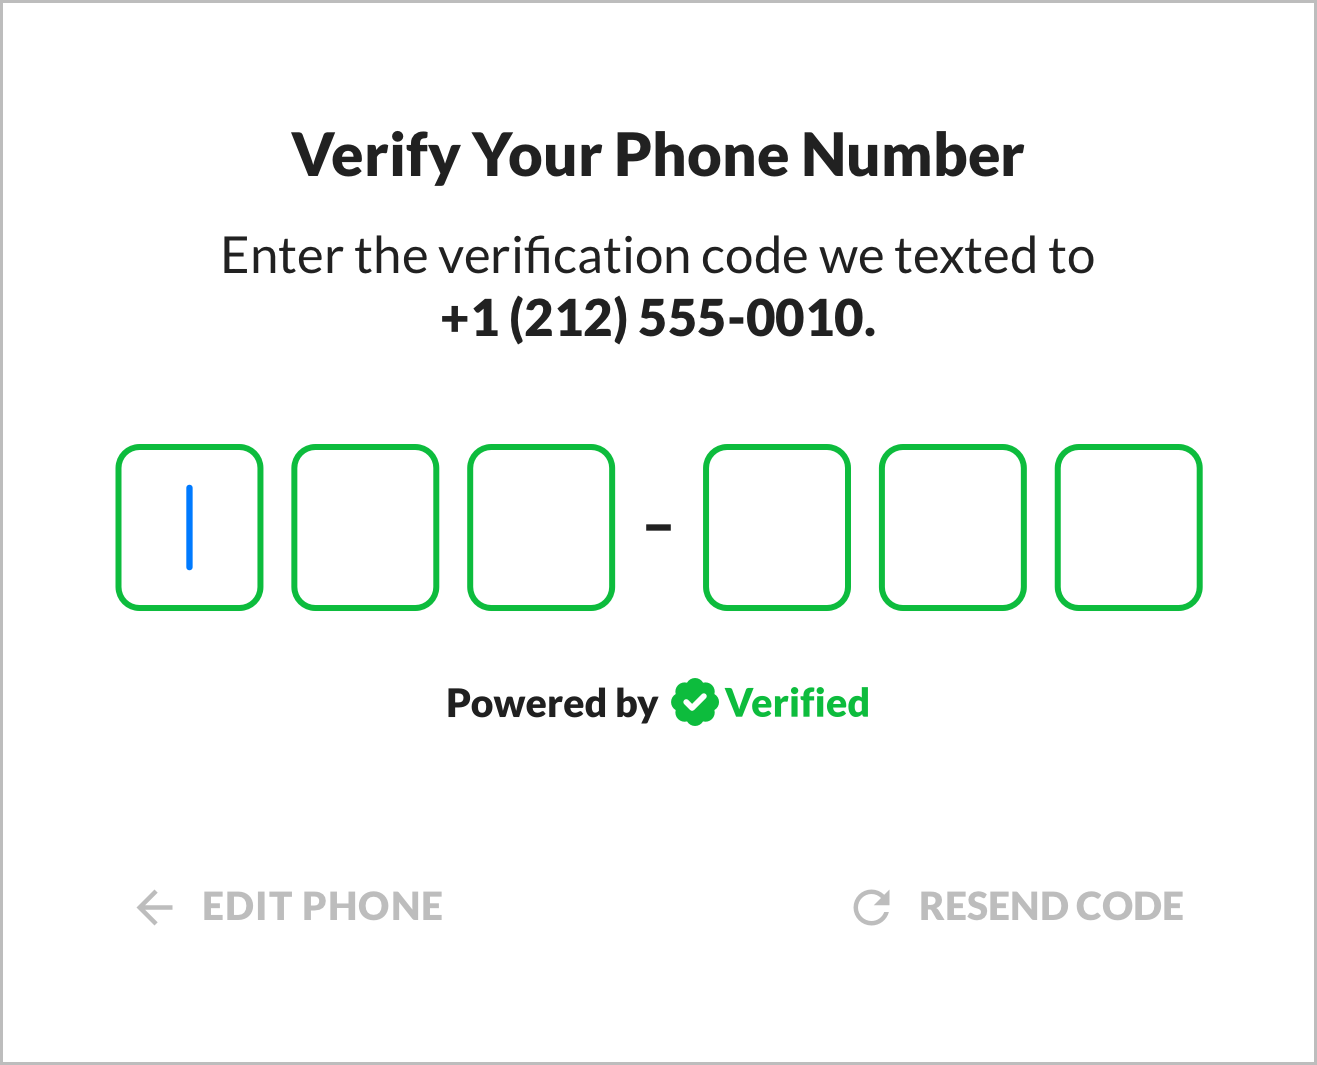 2. Verification Code: Prompt user for phone verification code.
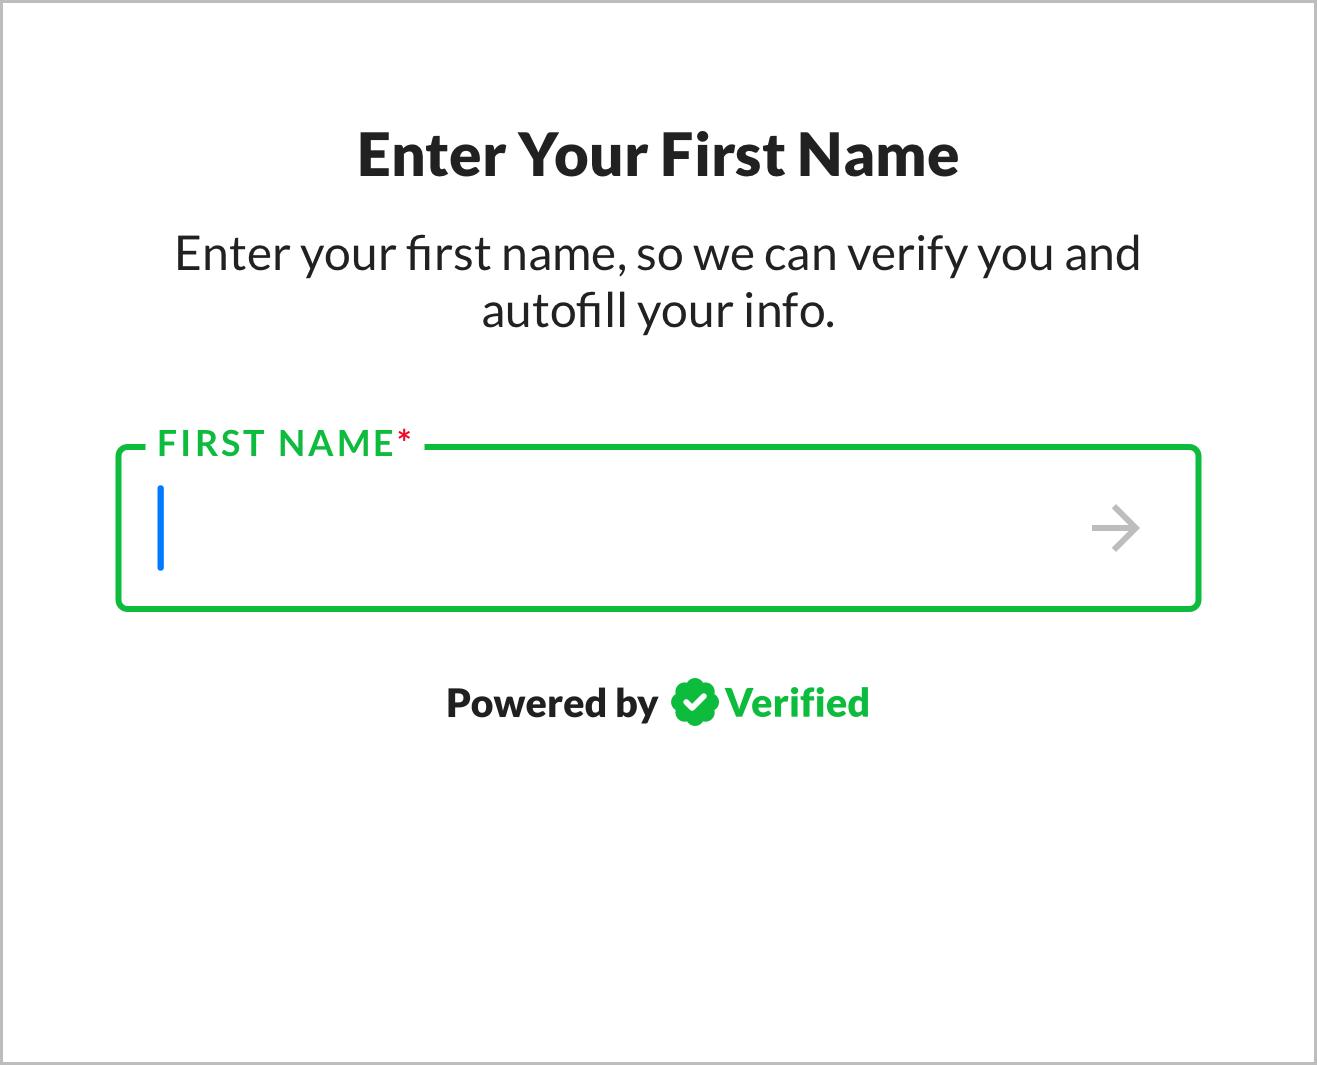 3. Challenge: Prompt user for challenge.
Challenge First
1. Challenge: Prompt user for challenge.
2. Phone + Consent: Prompt user for phone and consent.
3. Verification Code: Prompt user for phone verification code.
Challenge + Consent First
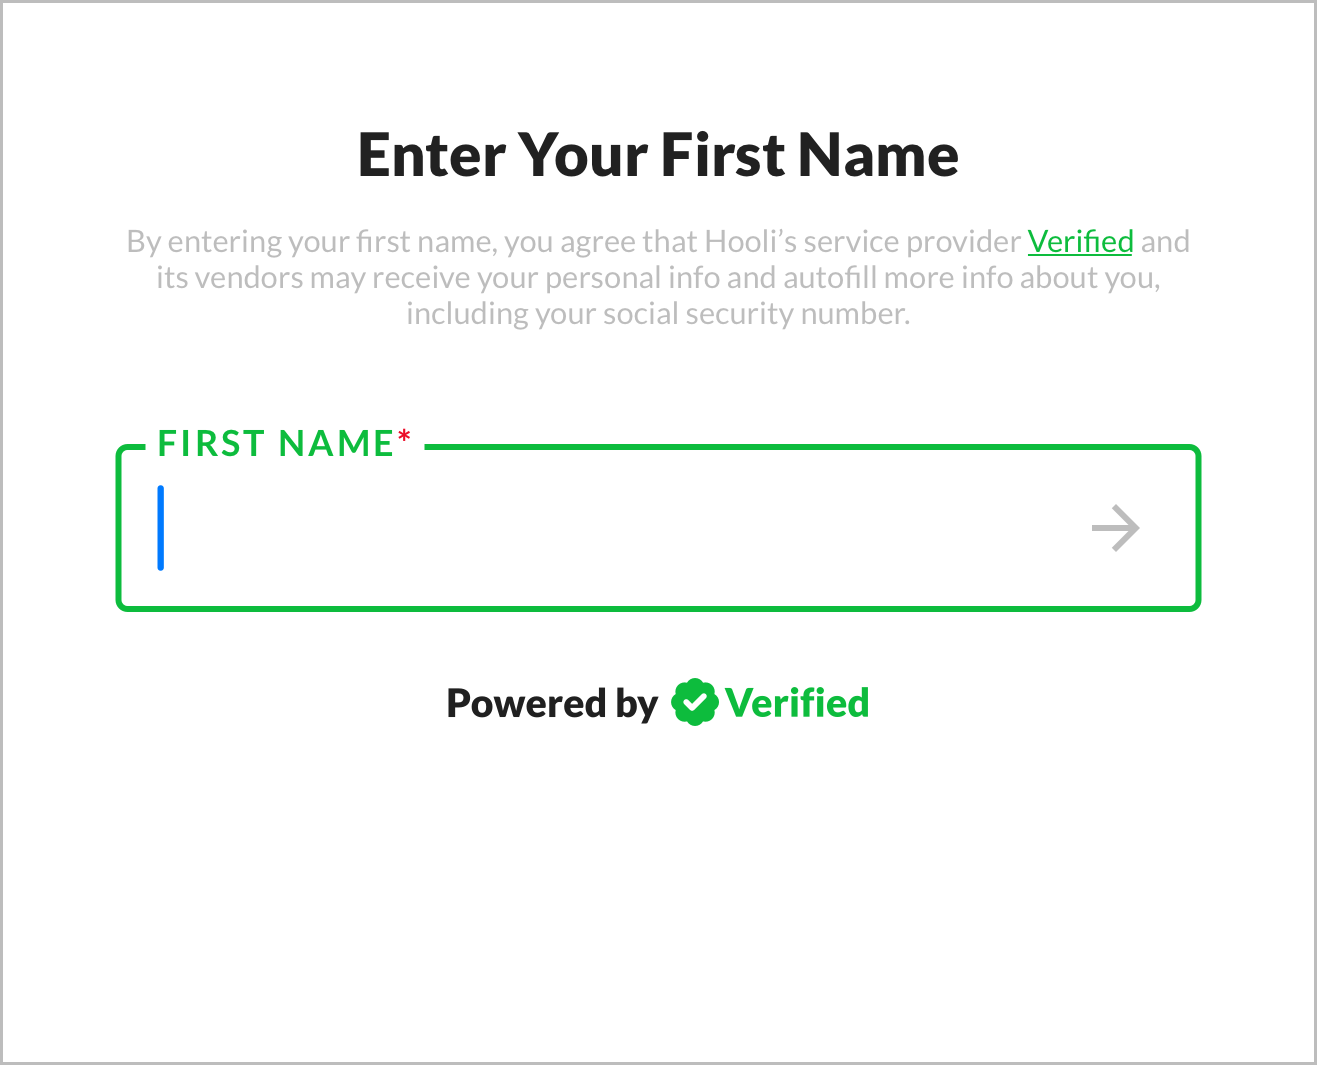 1. Challenge + Consent: Prompt user for challenge and consent.
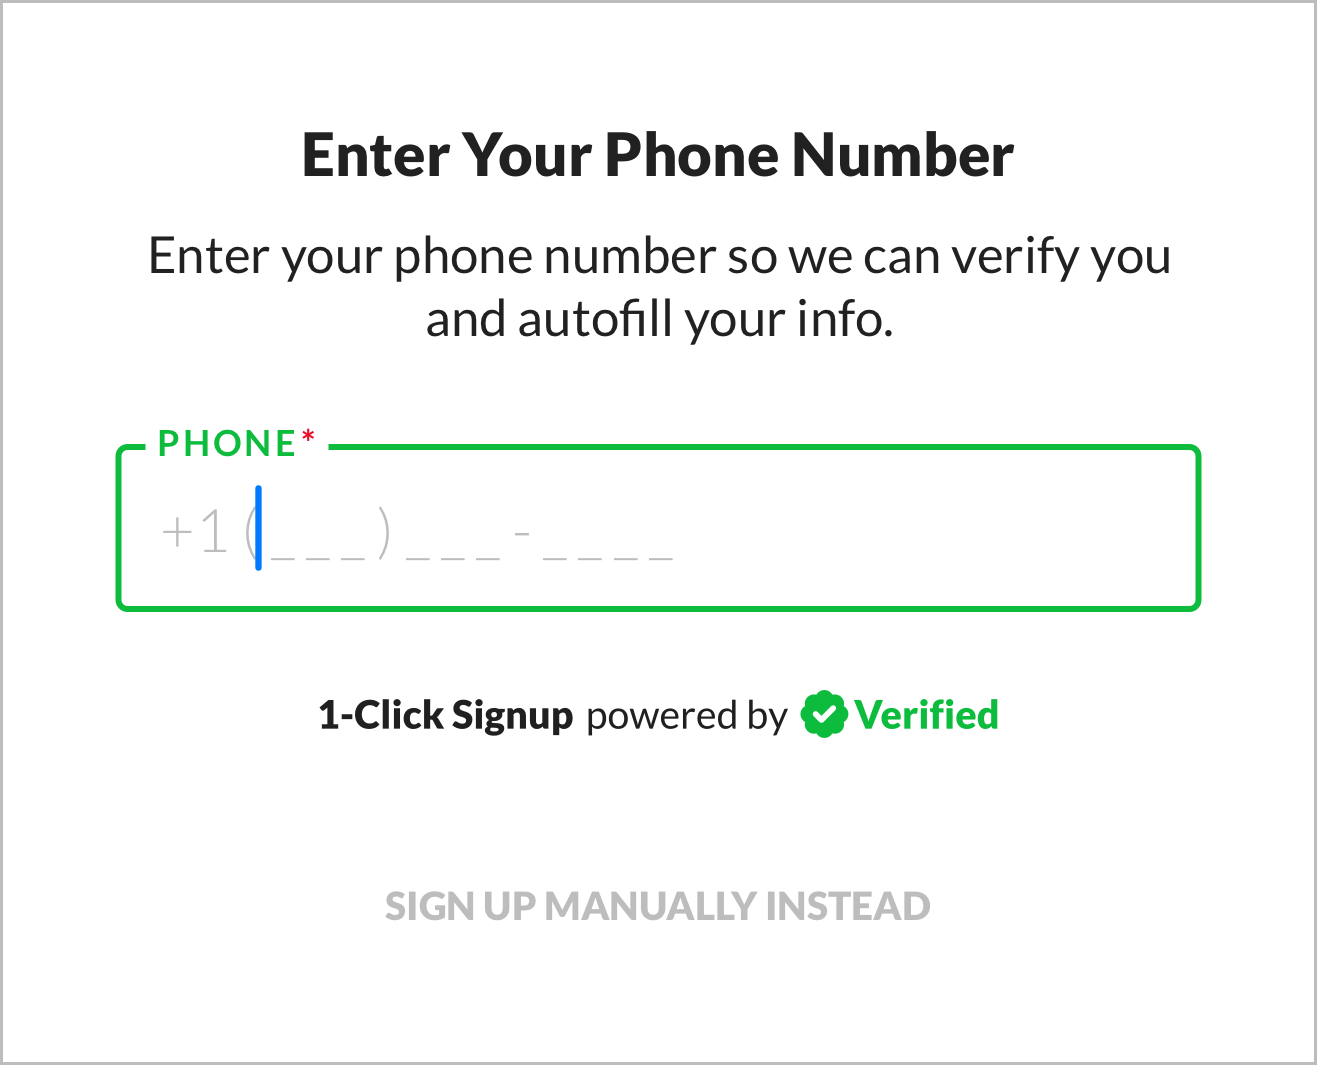 2. Phone: Prompt user for phone.
3. Verification Code: Prompt user for phone verification code.
Phone First
1. Phone: Prompt user for phone.
2. Verification Code: Prompt user for phone verification code.
3. Challenge + Consent: Prompt user for challenge and consent.
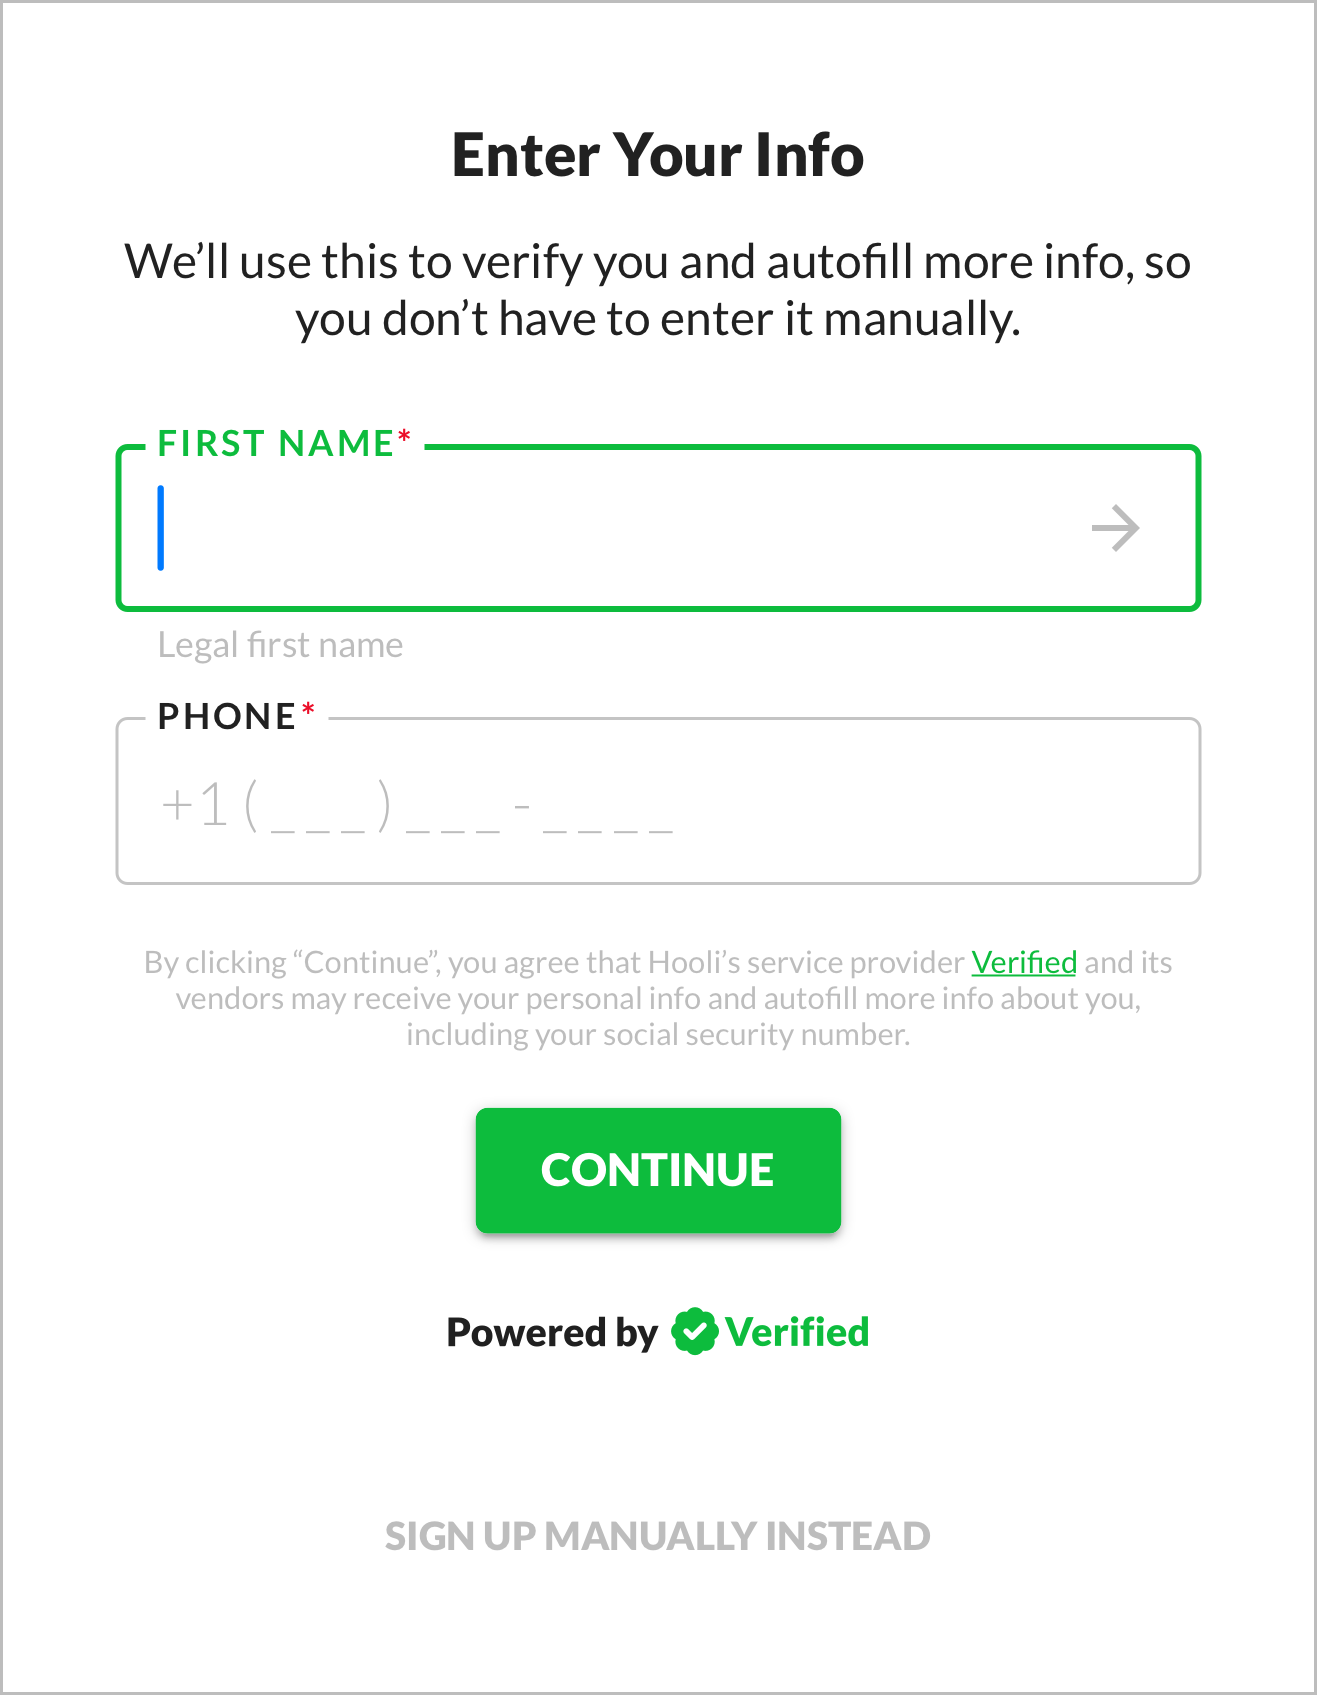 1. Challenge + Phone + Consent: Prompt user for challenge, phone, and consent.
2. Verification Code: Prompt user for phone verification code.
Consent First
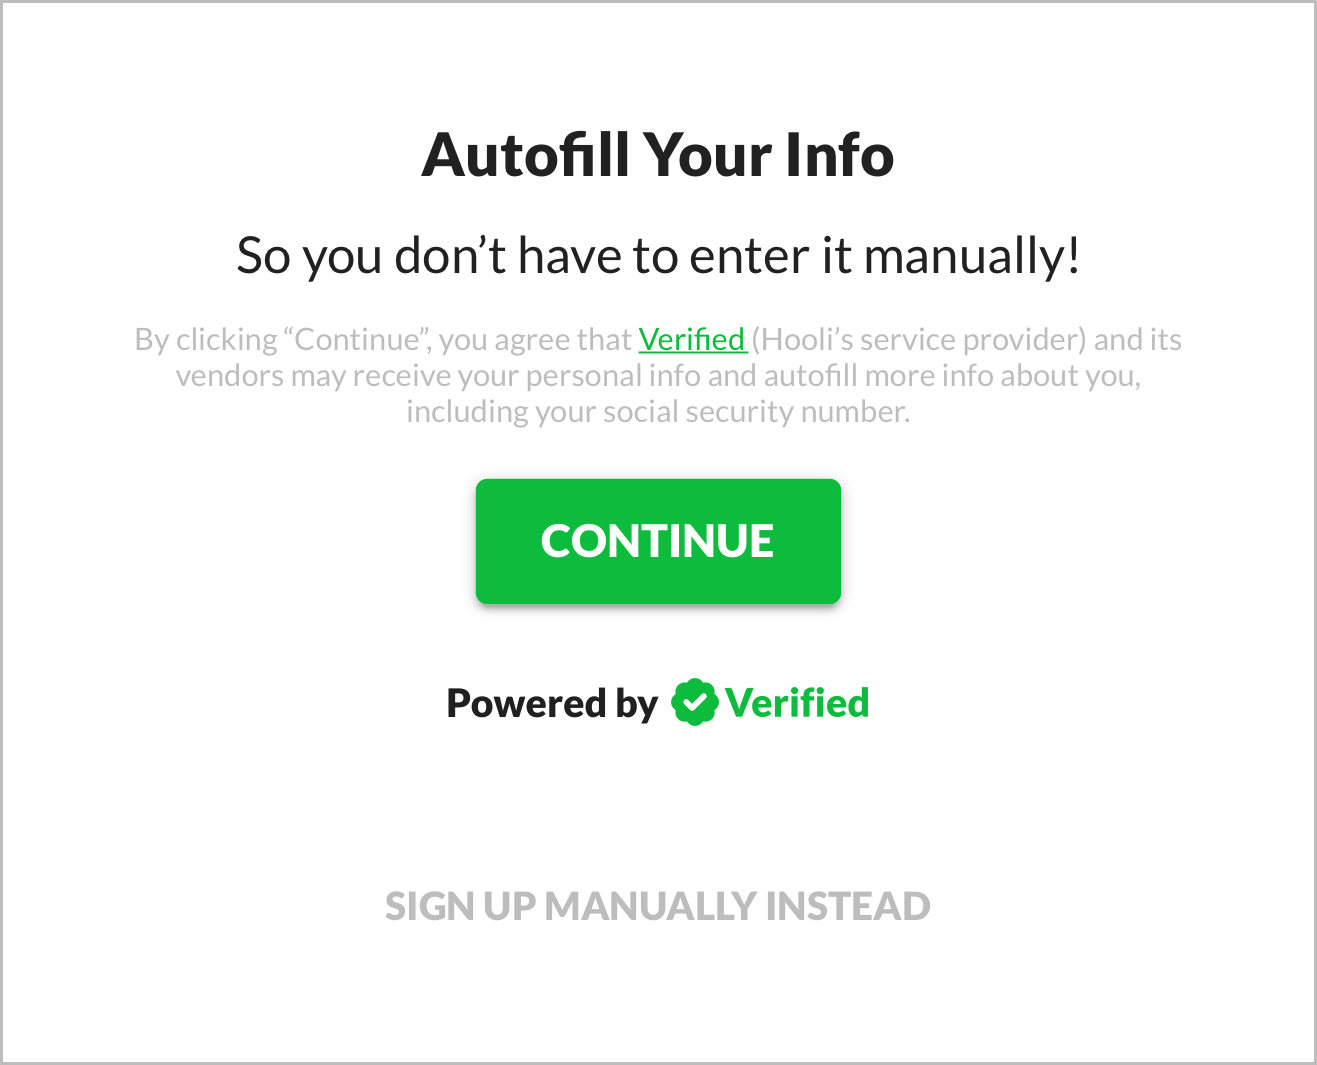 1. Consent: Prompt user for consent.
2. Phone: Prompt user for phone.
3. Verification Code: Prompt user for phone verification code.
4. Challenge: Prompt user for challenge.
Consent Last
1. Phone: Prompt user for phone.
2. Verification Code: Prompt user for phone verification code.
3. Challenge: Prompt user for challenge.
4. Consent: Prompt user for consent.
Verified Phone
To verify the user's phone number, you can either:
- Use our 1-Click Verify API: This is our dedicated phone verification solution.
- Use another phone verification solution: This can be one of the many phone verification solutions on the market or one you build yourself. You can use any solution you like, as long as it satisfies the requirements listed in the warning below.
We highly recommend using 1-Click Verify because:
- It can autofill verified phone numbers from nothing! When this option is available, the user doesn't have to enter a phone number or SMS verification code at all. It's magical.
- It ties directly into 1-Click Signup to make the integration especially easy and secure. Specifically, 1-Click Verify outputs a
verificationUuidthat you can pass directly to 1-Click Signup, which we use to hydrate the user's phone number and confirm it was properly verified.
If you use another solution for phone verification, we'll need to do a compliance review of your integration to ensure phone verification is being handled properly. Specifically, we check for:
- Recency: Phone numbers must be verified within 24 hours of when you use 1-Click Signup to autofill user data (to ensure data freshness).
- Entropy: Verification codes must be at least 6 digits long (to prevent brute force attacks).
- Expiration: Verification codes must be short lived, lasting no more than 10 minutes (to prevent staleness).
- One-time use: Verification codes must be able to be used only once (to prevent reuse attacks).
- Rate limiting: Verification code attempts must be rate limited (to prevent brute force attacks).
- Attempt limiting: Verification code attempts must be limited to a small number for a given phone number (to prevent brute force attacks).
(1-Click Verify, if you choose to use it, handles all of these requirements for you.)
Currently, we only support US mobile phone numbers. You'll need to pass these to our API in E.164 format. This is the +1 country code with a 10-digit subscriber code appended to it, for example +12125550010.
See our Demo for an example of this.
We recommend using a phone number input that auto submits when the user enters 10 digits. (See the Phone screen of our User Experience guide for full details.) Here's an example:
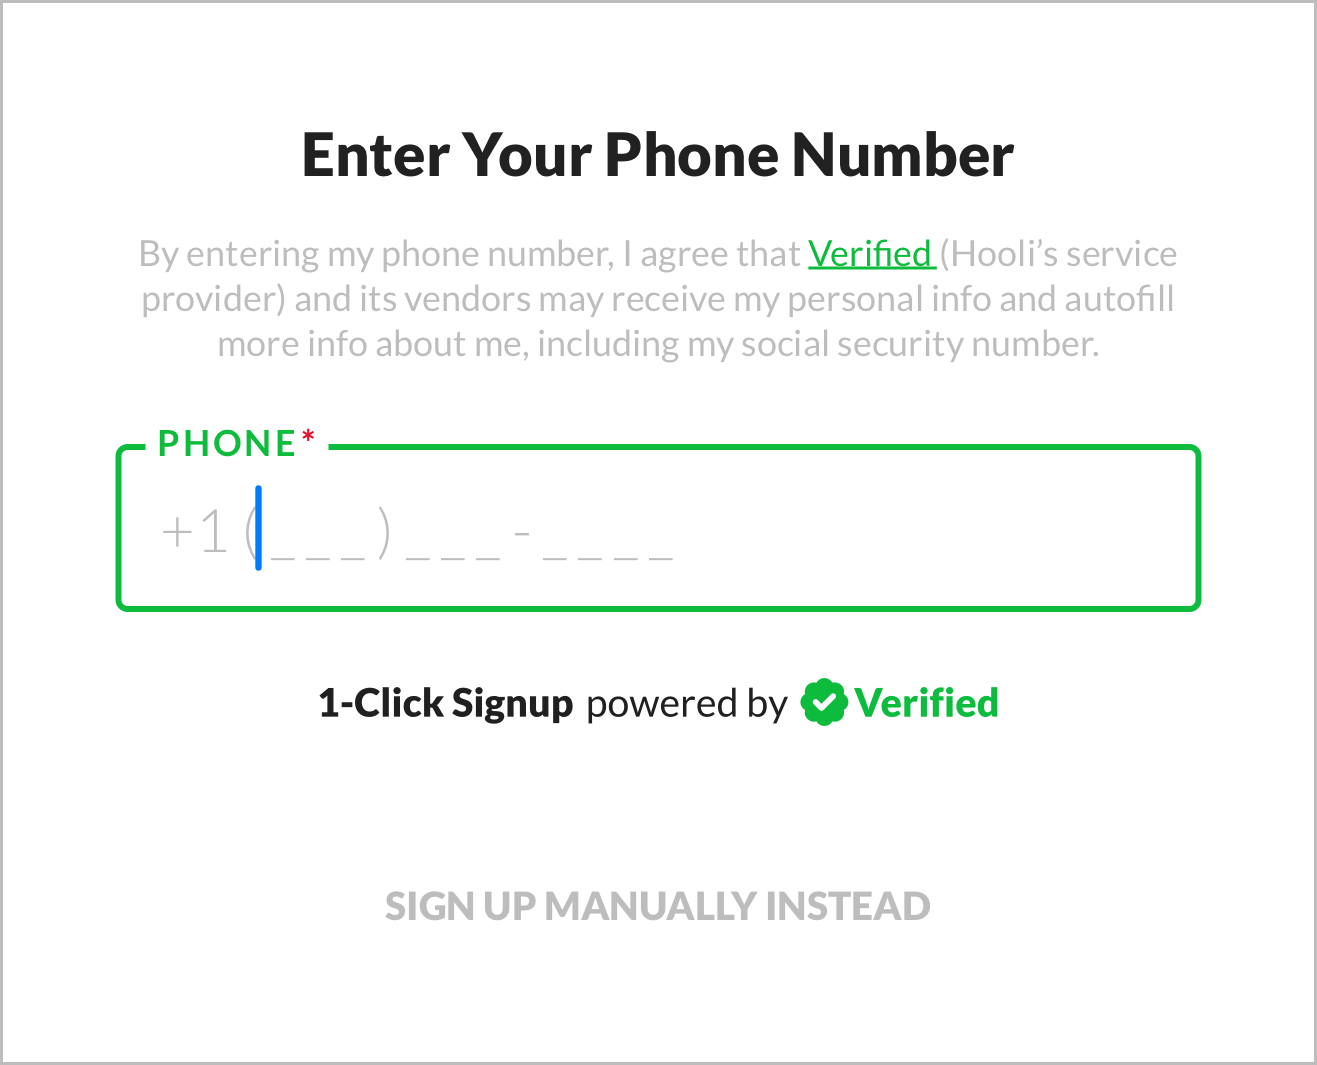 Verified consent language, phone number input, and the green variant of the Powered by Verified graphic
Challenge
We support first name, birth date, and SSN4 as challenges (secondary inputs alongside verified phone).
You can use one or more challenges, but we recommend using only one to streamline the user experience.
- First Name
- Birth Date
- SSN4
See the First Name screen of our User Experience guide for our detailed recommendations. Here's an example:
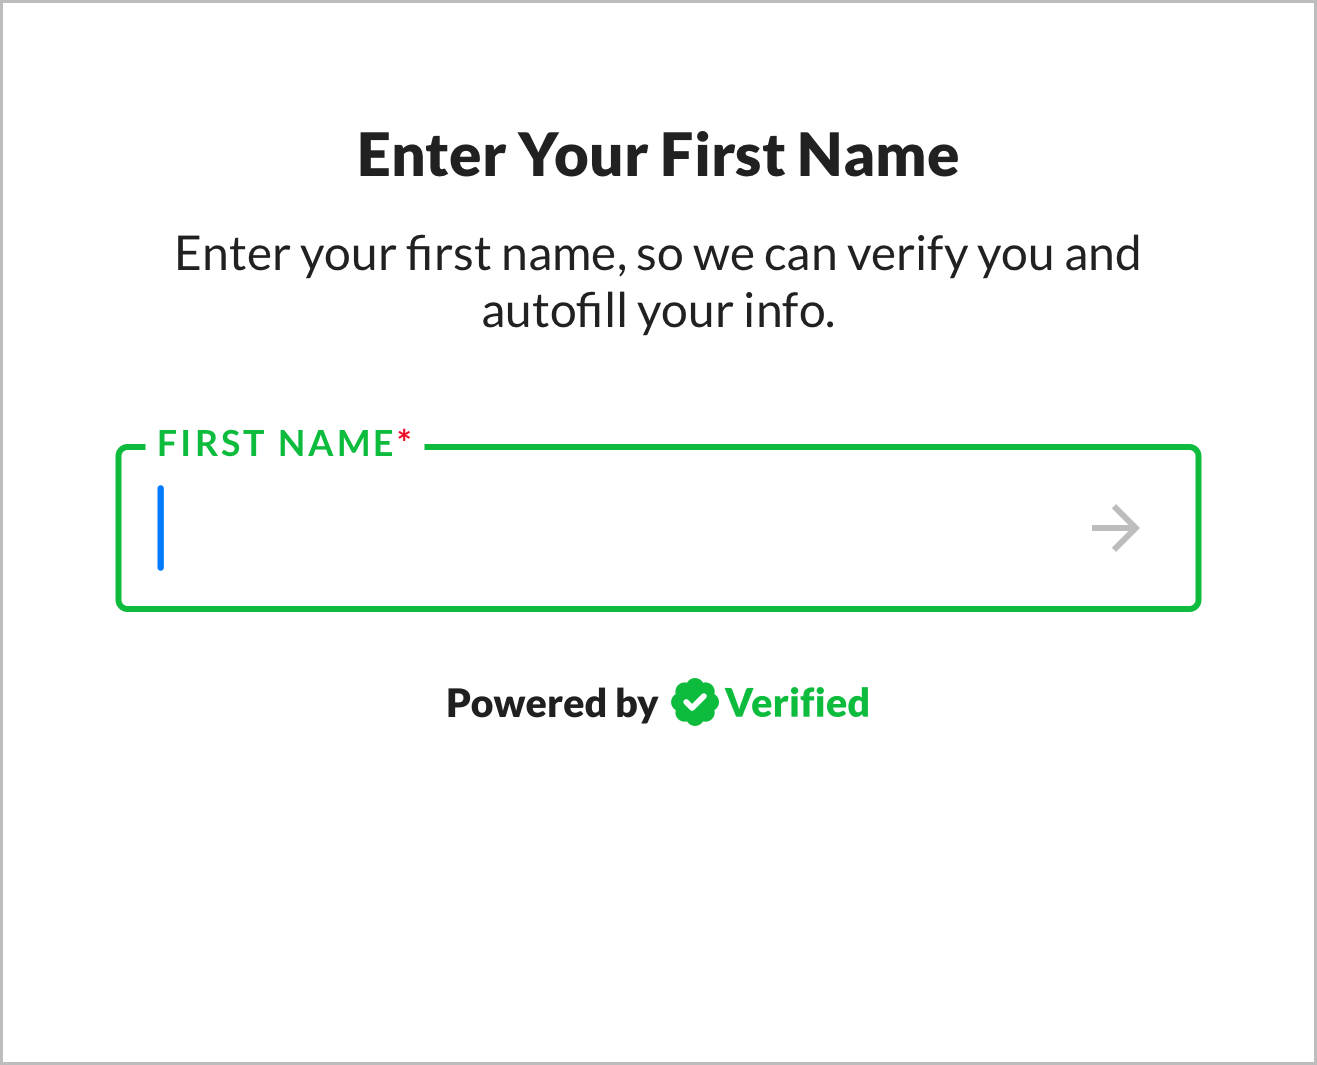 Text input and the green variant of the Powered by Verified graphic
Depending on your use case, it can be helpful to stress to the user that they need to use their real first name. Sometimes a user enters a dummy first name, thinking it doesn't matter, but in this case their real name is needed.
Some users go by a different first name than their legal first name. Generally, any first name they go by will work! For example:
- One of Verified's founders goes by Liam, but his legal first name is William.
- He can enter either Liam or William and successfully use 1-Click Signup, because we see both of those first names associated with his phone number.
- However, if he enters a different name that he doesn't go by (even a common nickname for William, like Bill), 1-Click Signup won't autofill info for him, because we don't see that name associated with his phone number.
Currently, the first name 1-Click Signup outputs matches the first name the user inputs. Therefore, for a user with multiple first names (for example nickname and legal name), the first name they input determines what first name you'll receive from us. Continuing the example above:
-
One of Verified's founders goes by Liam, but his legal first name is William.
-
If he inputs Liam, 1-Click Signup will autofill Liam.
-
If he inputs William, 1-Click Signup will autofill William.
This matters if you specifically need the user's legal first name some time in the future, for example if you use 1-Click Health after 1-Click Signup. If you need the user's legal first name later, prompt them to enter their legal first name at the outset.
We recommend using a numeric input (formatted as MM/DD/YYYY)that automatically submits when the user enters 8 digits. See the Birthday of our User Experience guide for full details. Here's an example:
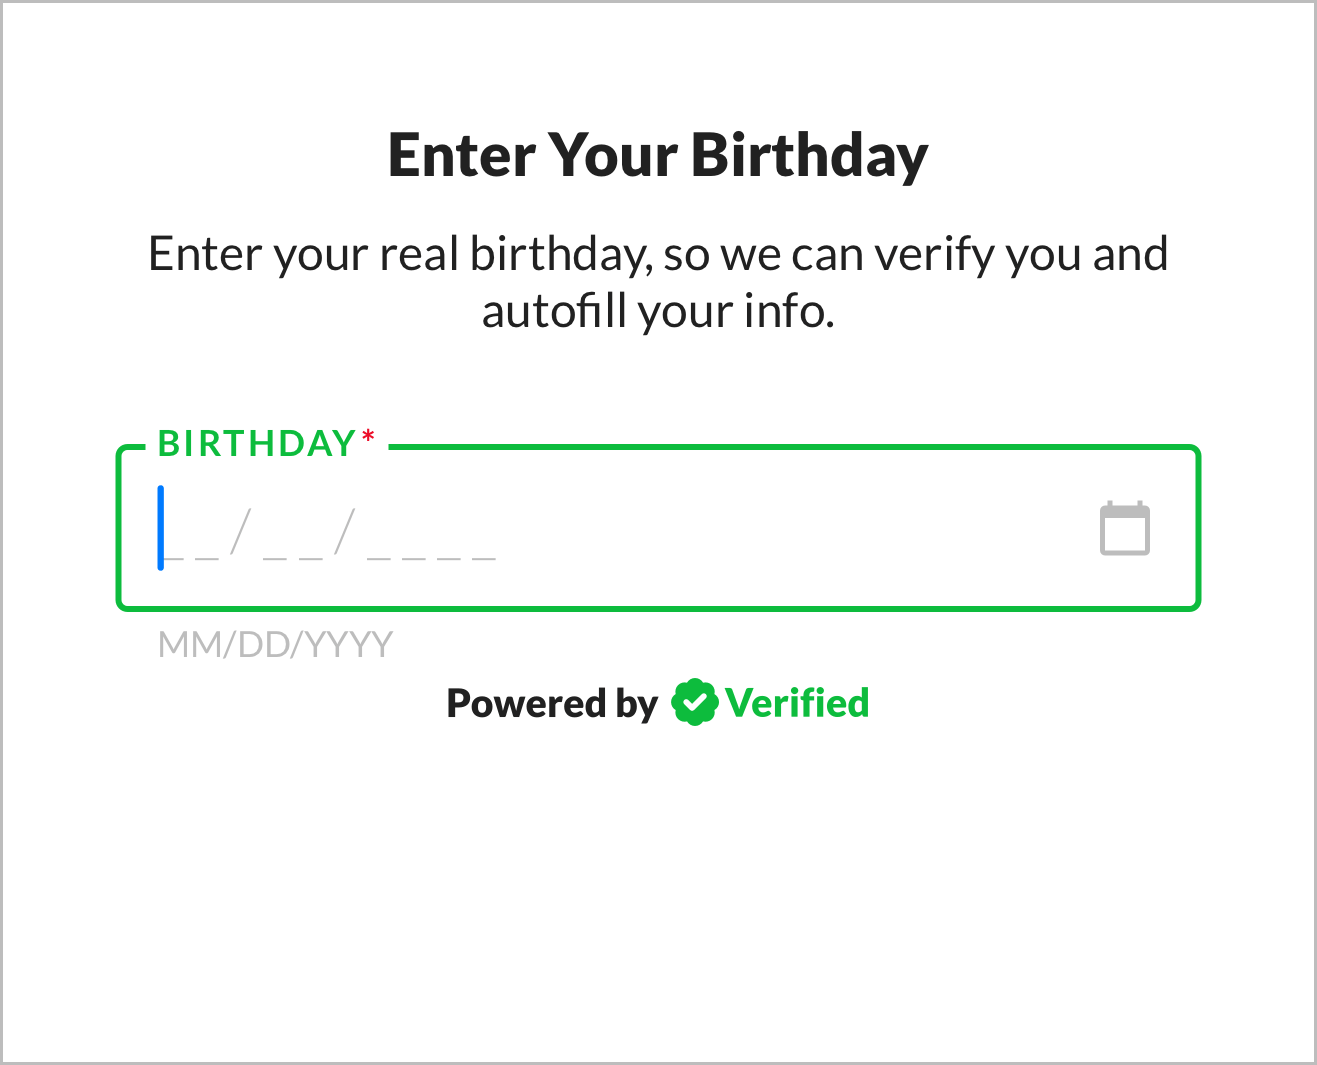 Numeric input, formatted as
MM/DD/YYYY, and the green variant of the Powered by Verified graphic
Numeric input, formatted as
MM/DD/YYYY, and the green variant of the Powered by Verified graphic
Depending on your use case, it can be helpful to stress to the user that they need to use their real birthday. Sometimes a user enters a dummy birthday, thinking it doesn't matter (for example thinking that you only need to know they're 18+), but in this case their real name is needed.
You'll need to pass the birth date to our API (in the request body of POST /1-click) in yyyy-MM-dd format, but you should collect it from the user in whatever form you think results in the best user experience for your use case.
We recommend using a numeric input that automatically submits when the user enters 4 digits. See the SSN4 of our User Experience guide for full details. Here's an example:
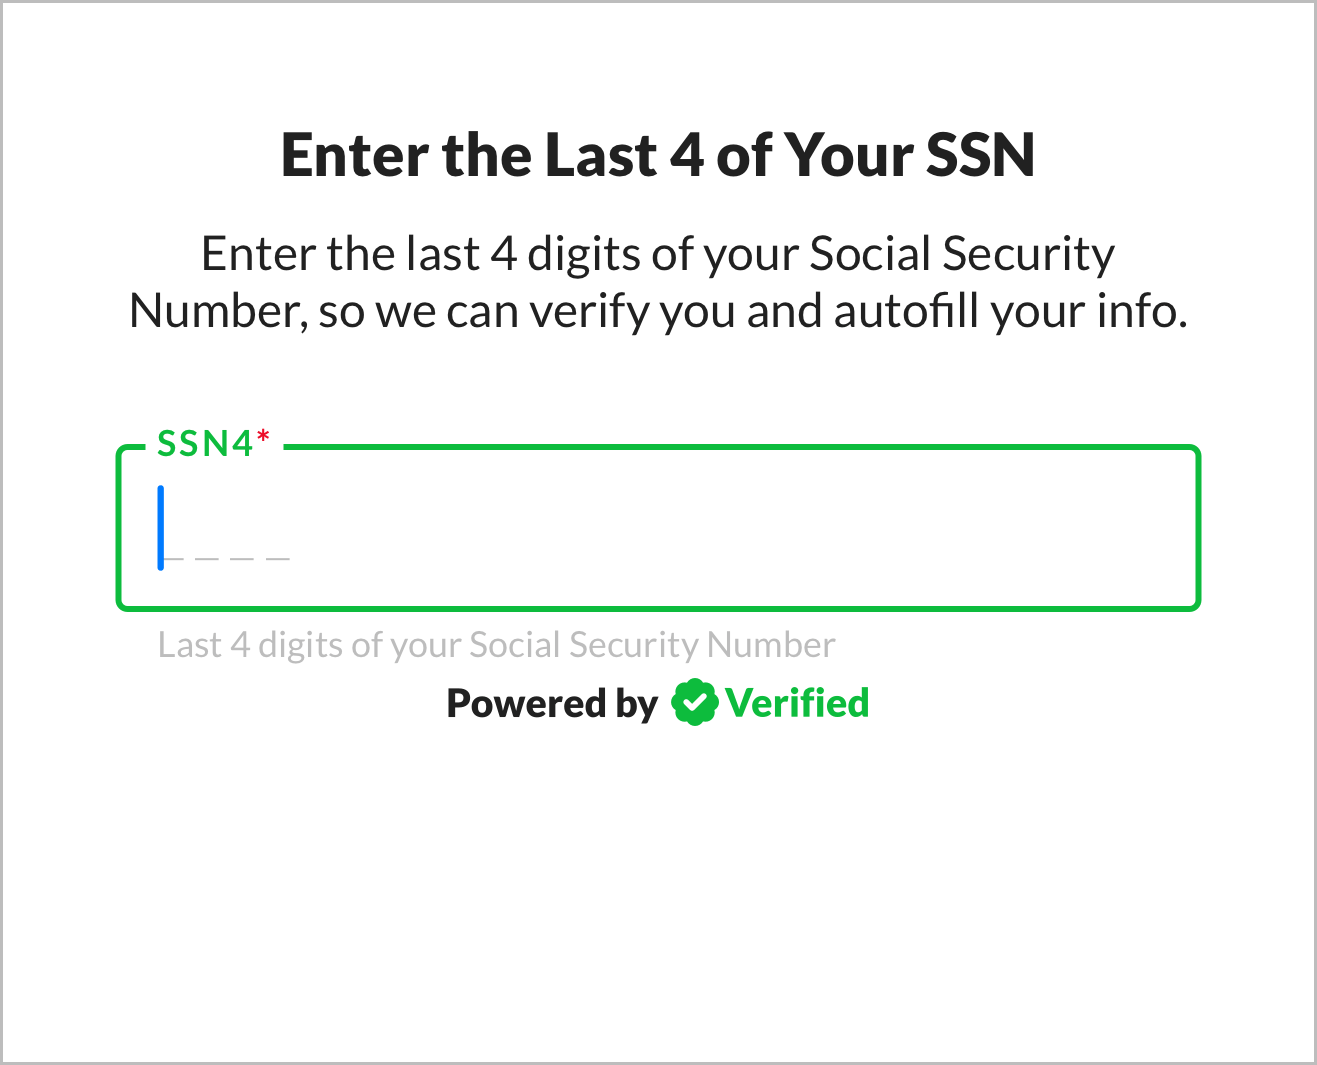 Numeric input and the green
signup variant of the Powered by Verified graphic
Numeric input and the green
signup variant of the Powered by Verified graphic
Consent
Users must give informed consent for their info to be autofilled with 1-Click Signup. To collect this consent, you need to use our 1-Click Signup consent language and a Powered by Verified graphic.
Consent Language
You must use this 1-Click Signup consent language:
By
{taking this action}, you agree that{Brand Name}’s service provider Verified and its vendors may receive your personal info and autofill more info about you, including your social security number.
- Replace
{taking this action}with the action the user will take to start 1-Click Signup. For example:- If you use a form with a phone number input that autosubmits (which we recommend), you should use "entering your phone number".
- If you use a Continue button, you should use "clicking Continue".
- Link "Verified" to https://verified.inc and make it underlined and a different color than the rest of the text (so the user knows it's a link).
- Replace
{Brand Name}with your brand name. - Omit "including your social security number" if won't autofill SSNs with 1-Click Signup: that is, if you didn't include SSN in your Default Credential Requests setting.
Here's an example:
By entering your phone number, you agree that Hooli’s service provider Verified and its vendors may receive your personal info and autofill more info about you, including your social security number.
This consent language can be included alongside or as part of other legal language you already use, but it must be displayed to the user — not just included in terms you link out to.
You may not modify this consent language except as described above. It's the result of extensive legal review to ensure it meets all requirements for informed consent.
Powered by Verified Graphic
Because "verified" is itself a common word, our company name alone doesn't unambiguously indicate to users which specific company they're consenting to. Including a Powered by Verified graphic with our logo makes it unambiguous and satisfies the requirement of informed consent.
Therefore, you must include a "Powered by Verified" graphic, which should be placed just below the trigger you use to start the 1-Click Signup flow. For example, this may be a phone number input or a button.
We provide many different variants of the graphic, so you can choose the one that best fits your use case and the background color of your application:
"Powered By Verified" Graphic Variants
Powered by Verified
Black and Green:


White and Green:


Black:


White:


Gray:


1-Click Signup powered by Verified
Black and Green:


White and Green:


Black:


White:


Gray:


1-Click Health powered by Verified
Black and Green:


White and Green:


Black:


White:


Gray:


1-Click Login powered by Verified
Black and Green:


White and Green:


Black:


White:


Gray:


1-Click Verify powered by Verified
Black and Green:


White and Green:


Black:


White:


Gray:


1-Click Apply powered by Verified
Black and Green:


White and Green:


Black:


White:


Gray:


1-Click Access powered by Verified
Black and Green:


White and Green:


Black:


White:


Gray:


1-Click AutoFill powered by Verified
Black and Green:


White and Green:


Black:


White:


Gray:


2. Call POST /1-click.
You must call POST /1-click within 24 hours of verifying the user's
phone number. This ensures we source fresh, accurate data.
Never use Verified API keys client side. Only use them server side. Verified API keys allow you to source sensitive data about users, so you must keep them secure. If you use a Verified API key client side, our firewall will block your request, and you'll get this firewall error.
Call POST /1-click:
- If you used 1-Click Verify to verify the user's phone number, use
verificationUuidin the request body. If you used another phone verification solution, usephone. - If you collected a challenge (first name, birth date, or SSN4), include it in the request body (as
fullName.firstName,birthDate, orssn4).
- From 1-Click Verify
- From Another Phone Verification Solution
- First Name
- Birth Date
- SSN4
{
    verificationUuid: string, // Example: "f3e2c1d0-4b5a-6789-0abc-def123456789"
    fullName: {
        firstName: string // Example: "Richard"
    }
}
{
    verificationUuid: string, // Example: "f3e2c1d0-4b5a-6789-0abc-def123456789"
    birthDate: string // Example: "1989-08-01"
}
{
    verificationUuid: string, // Example: "f3e2c1d0-4b5a-6789-0abc-def123456789"
    ssn4: string // Example: "6789"
}
- First Name
- Birth Date
- SSN4
{
    phone: string, // Example: "+12125550010", must have been verified within 24 hours
    fullName: {
        firstName: string // Example: "Richard"
    }
}
{
    phone: string, // Example: "+12125550010", must have been verified within 24 hours
    birthDate: string // Example: "1989-08-01"
}
{
    phone: string, // Example: "+12125550010", must have been verified within 24 hours
    ssn4: string // Example: "6789"
}
You'll see in the endpoint reference for POST /1-click that it supports additional inputs.
If you already have any of these, include them in the request body. (But, we don't recommend prompting for any of them yet if you don't already have them.)
Here's why: You'll see later in this guide that, if we can't source data for the user based on the inputs you provide, you can prompt the user for an additional input(s) and then make another API call. If for any reason you already have this information, you should include at this step so no further call will be necessary.
If we can source data for the user, the response body will contain a 1ClickEntity, keyed on identity, that contains the user's data and metadata about it.
If we can't source data, the response body will contain an error with a Verified error code. (Note that this error code, which is Verified specific, is data.errorCode in the error object, not code (which is a standard HTTP response status code).) See step 2a below for how to handle Verified error codes.
You can retrieve data for 1 hour, at which point it's deleted. Use GET /1-click instead of POST /1-click, so that a duplicate 1-Click Signup event isn't created (and so you aren't billed twice).
a. (if needed) Handle errors.
The simplest 1-Click Signup integrations can treat all Verified error codes as generic errors, but you can improve your integration substantially by handling the ones listed below. There are other ones as well, but you can generally ignore those.
OCE011
The OCE011 Verified error code indicates that we need additional information (another challenge) to source data.
The inputs included in message and data.additionalInputs is a comma separated list of additional information.
Multiple values always indicate an inclusive OR: that is, you can pass one or more of the additional inputs. You do not need to pass all of the additional inputs included in the list!
For example, if inputs is birthDate, ssn4, you can pass either the user's birth date or their SSN4 (or both). We always recommend passing just one first because both are required only very rarely and, if they are both required, you will get another OCE011 error code indicating that the other one is required.
OCE012
The OCE012 Verified error code indicates that the challenge provided mismatched.
OCE013
The OCE013 Verified error code indicates that Verified found no credentials for the user.
OCE017
The OCE017 Verified error code indicates that Verified blocked the user because the risk score was too high.
OCE019
The OCE019 Verified error code indicates that the maximum number of attempts has been reached for one or more of the challenges.
3. Prompt user to confirm info.
You must display the user's credential data to them and have them confirm it's correct. The credential data is contained in credentials in the 1ClickEntity from the API response. You don't need to display any metadata (contained in metadata in the 1ClickEntity) though you can choose to if it's relevant.
You may not store a user's credential data if they don't confirm it. This is a compliance requirement. We will not approve your integration if you don't abide by it.
- Transparency: By displaying the user's data to them, you ensure they're aware of what data you've received about them.
- Accuracy: Although Verified provides very high quality data, we can never guarantee all data will be perfectly accurate. By having the user confirm their data, you can better avoid inaccuracies. Depending on your use case, you may want to give the user the ability to edit their data.
a. Mask sensitive info.
If you receive a birth date or SSN from Verified as an autofilled output, you must mask it as described below before displaying it to the user.
Masking sensitive info is a compliance requirement. We cannot approve you for Production access until you implement what's described below.
Birth Date
Mask the year digits (server side), so the client only displays the month and day digits. We recommend using the • character to mask and the most common US format MM/DD/YYYY, so that (for example) 1989-08-01 is displayed as 08/01/••••.
If you allow the user to edit the birth date, clear the entire value when they start editing (by deleting one character), so they don't just edit the first 4 digits (which could result in another valid birth date, but one that isn't theirs).
Social Security Number (SSN)
Mask the first 5 digits (server side), so the client only displays the last 4 digits. We recommend using the • character to mask and the most common US format NNN–NN-NNNN, so that (for example) 000456789 is displayed as •••-••-6789.
If you allow the user to edit the SSN, clear the entire value when they start editing (by deleting one character), so they don't just edit the last 4 digits (which could result in another valid SSN, but one that isn't theirs).
b. Display info for editing or confirmation.
We recommend that you:
- Use a static display for view mode.
- Use a form with autofilled inputs for edit mode.
- Include information about where the data comes from.
(See the Info screen of our User Experience guide for full details.) Here's an example:
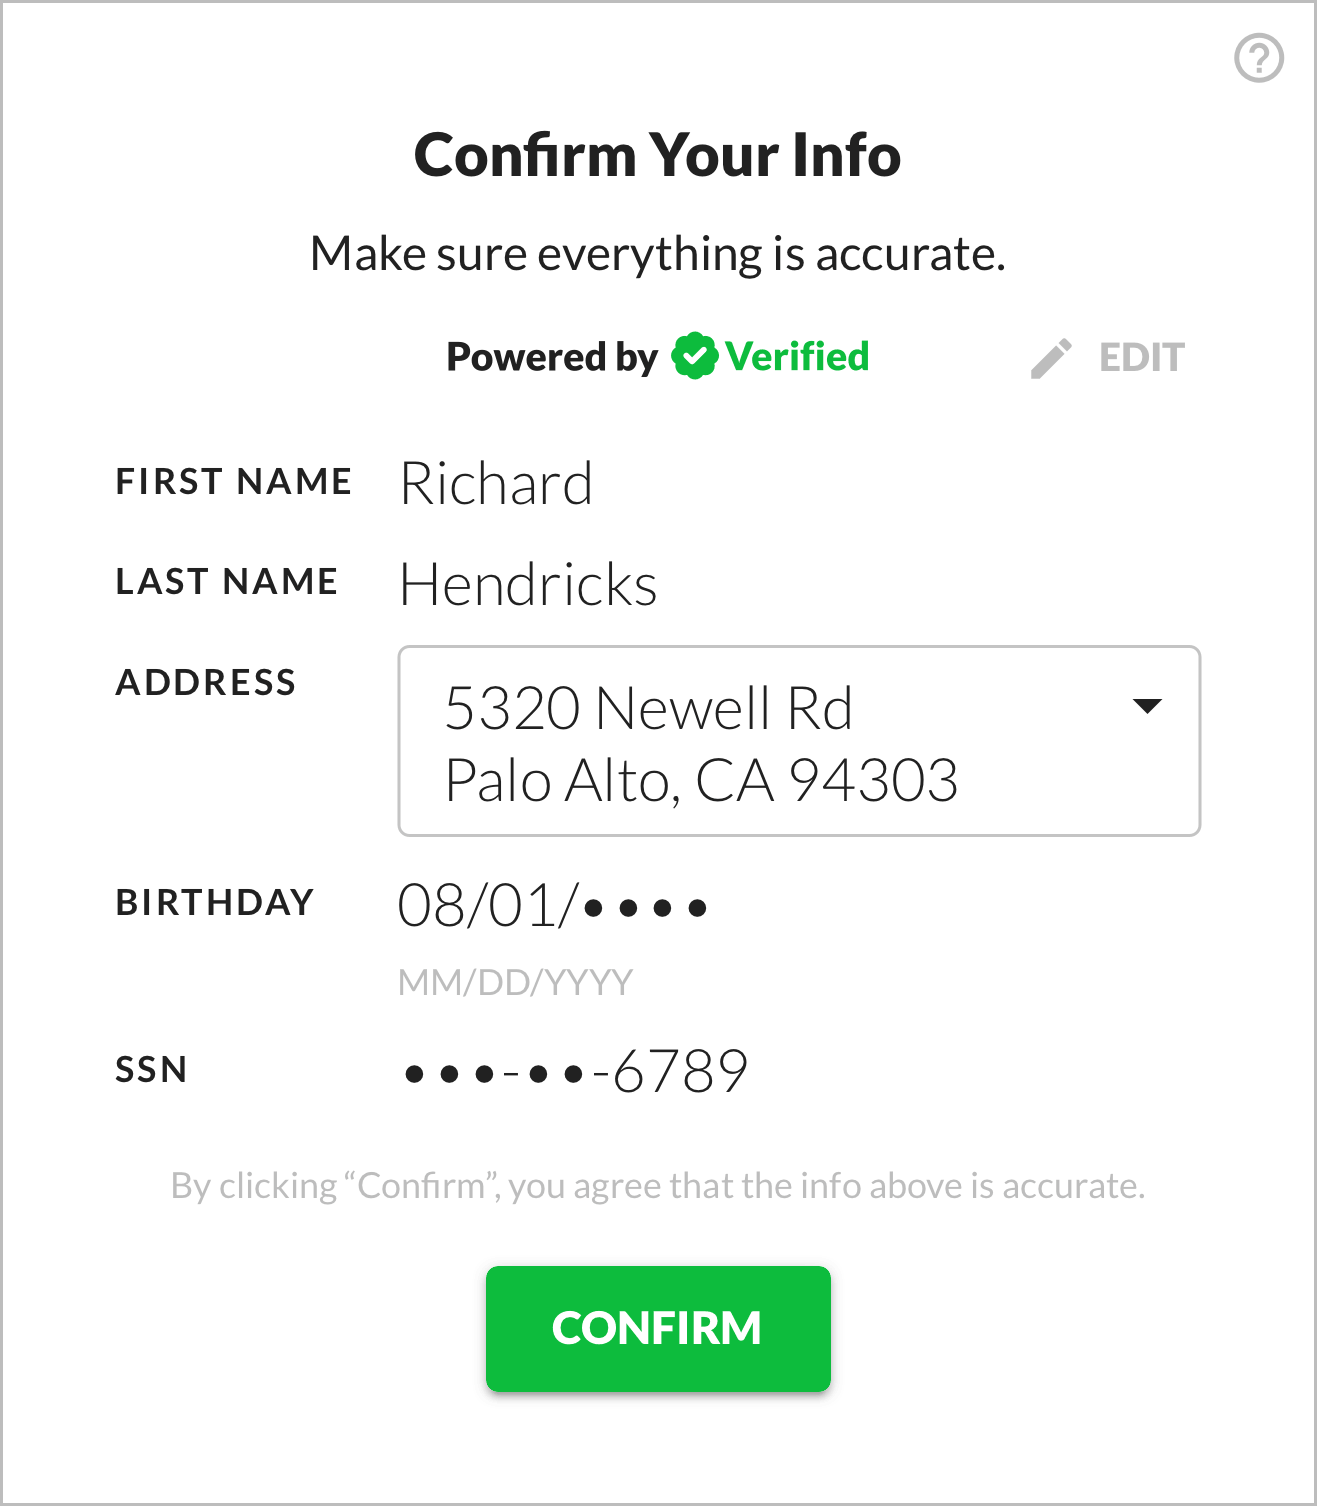 Static display for view mode, question mark button to see information about where data comes from
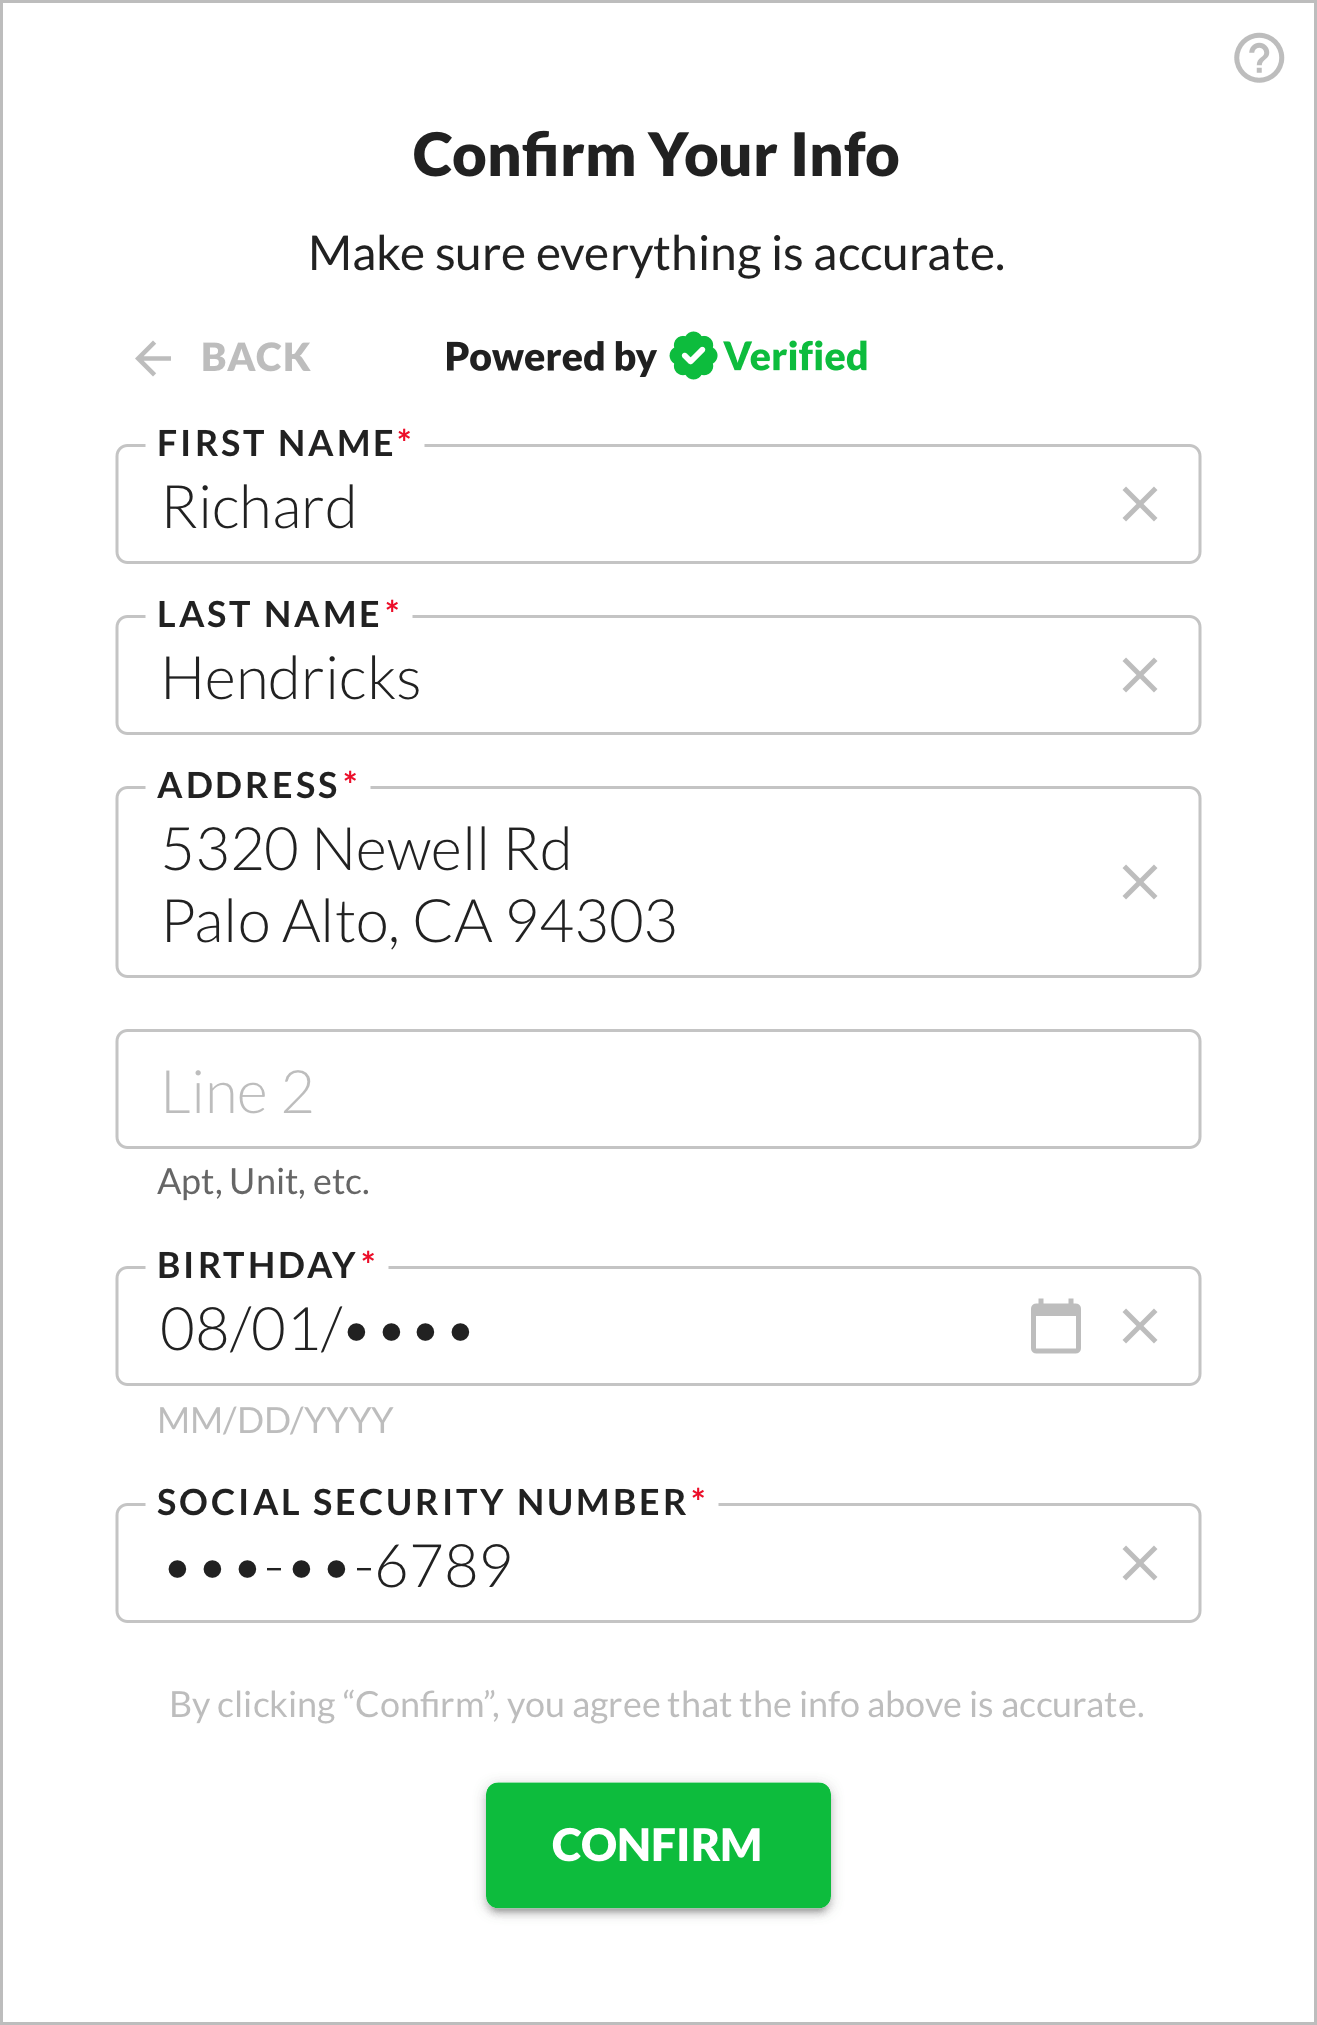 Form with autofilled inputs for edit mode, question mark button to see information about where data comes from
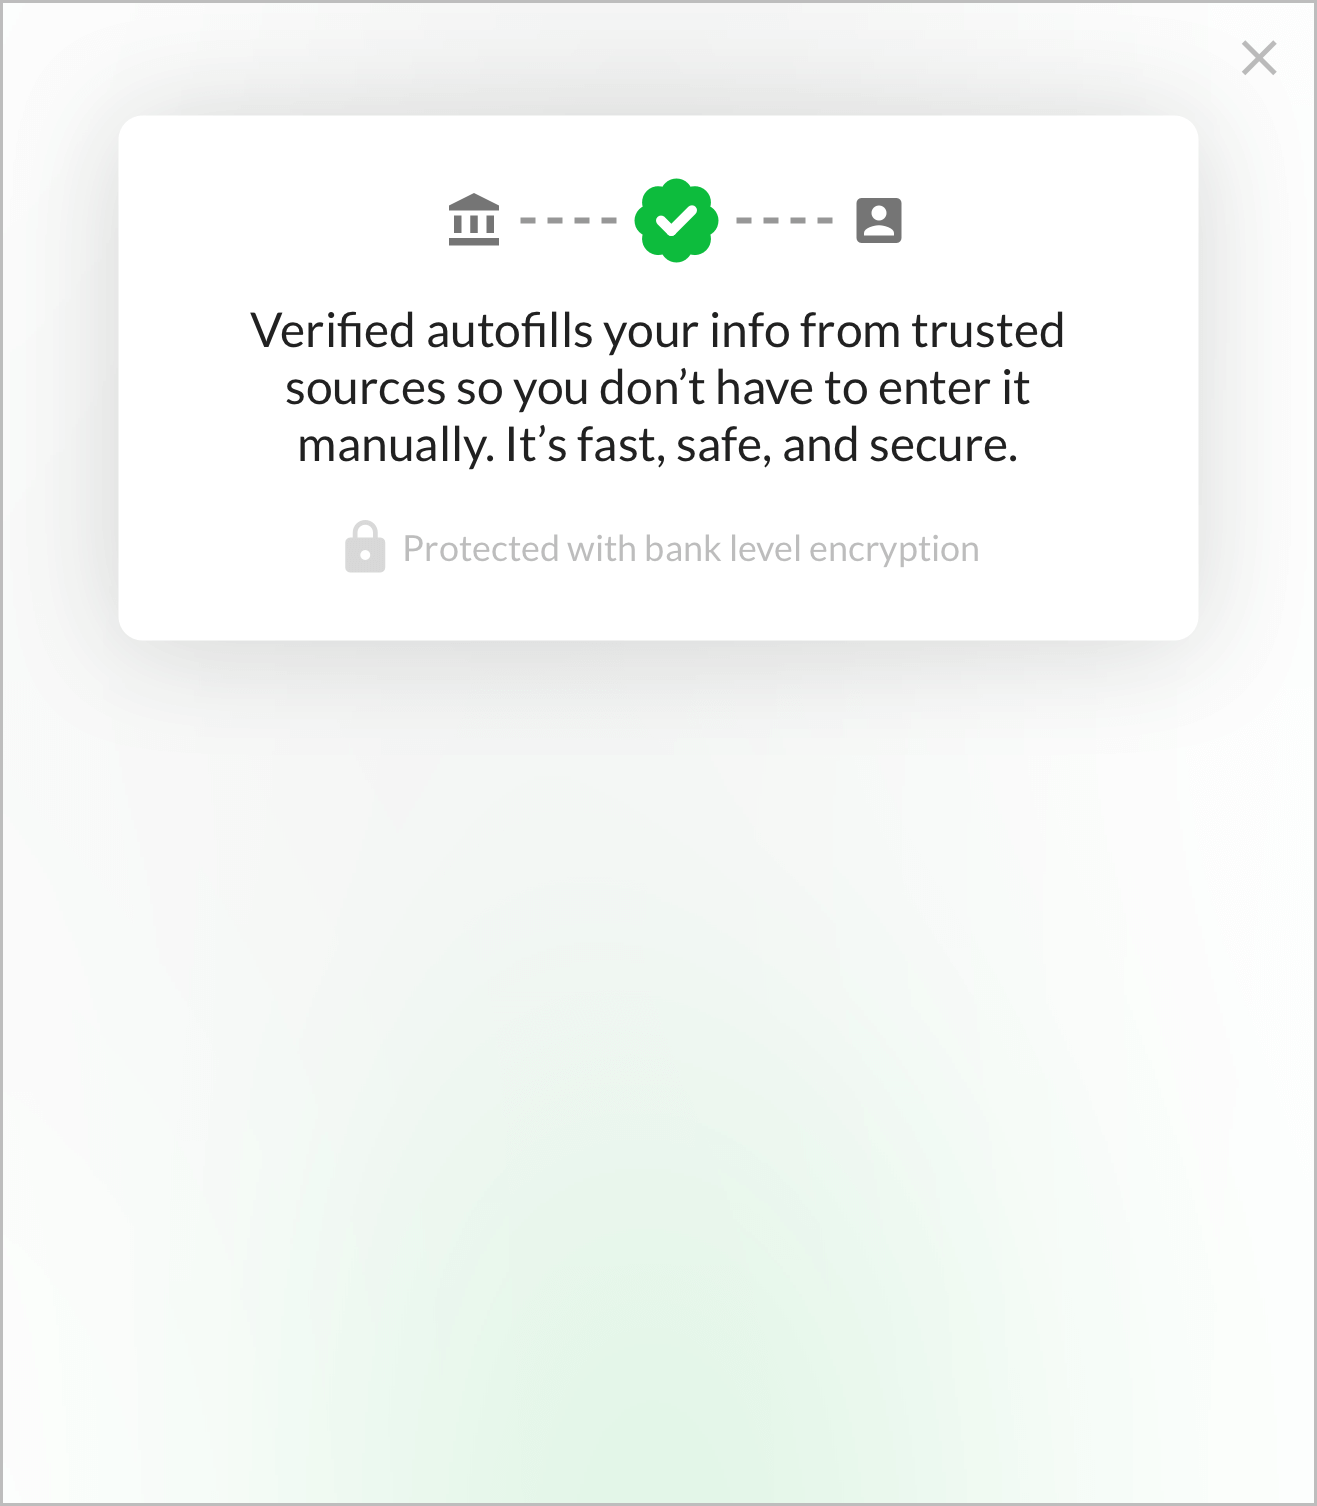 Information about where data comes from
i. Use a static display for view mode.
In edit mode, we recommend that you display the user's data statically and show an edit button that lets them go into edit mode.
If you receive multiple credentials of a given type (for example Address), you can display a dropdown of options. If the user goes into edit mode, you should use the selected value in the dropdown to autofill an input for that credential type.
ii. Use a form with autofilled inputs for edit mode.
In edit mode, we recommend that you display the user's data using a form with autofilled inputs.
You can enable or disable each input depending on whether you want the user to be able to edit the data it contains. The upside of allowing the user to edit data is that it allows them to correct any inaccuracies. The downside is that user input isn't verified and may make fraud more likely.
iii. Include information about where the data comes from.
Including some information about where the data comes from helps users understand the magic of 1-Click Signup and feel comfortable with it. We recommend this language:
Verified autofills your info from trusted sources so you don’t have to enter it manually. It’s fast, safe, and secure.
The most common inaccuracy is an outdated address. We keep user addresses up to date as much as possible, but if the user has moved very recently, we may not yet have their current address.
Less commonly, a user may have an outdated name, if they've recently had it legally changed and we haven't yet updated it.
Some data points, like birth date and SSN, should never change, but it's still possible (in very rare cases) for these to be inaccurate. So, if having perfectly accurate data is crucial for your use case, we recommend that you have users confirm it.
Go Live!
Test in Sandbox
Test with our 1-Click Signup test users.
Request Production Approval
When you're ready to go live, request approval for Production access:
- Go to the Brand Details page for your brand in the Verified Dashboard.
- Click the Production tab in the upper right, and make sure your brand settings are configured as you intend them to be.
- Click the Request Approval button under the API Keys section.
- Complete the steps listed in the dialog.
- Click the Submit Request button.
You can use the Sync from Sandbox buttons to quickly port some setting configurations from Sandbox to Production. Note, however, that this is not possible for all settings: some need to be configured manually for Production.
In step 4, you'll be asked to confirm the following:
You'll also be prompted to share a link to your Sandbox integration and/or schedule a 15 minute call with us, so we can review your integration to see that it's compliant and working properly. Once we approve it, you'll have access to a Production API key on the Brand Details page.
Swap Sandbox for Production
Once you have Production access, just swap Sandbox for Production:
- Swap your Sandbox API key for your Production API key.
- Swap the Sandbox base URL for the Production base URL.
Then you'll be live with 1-Click Signup! ✅